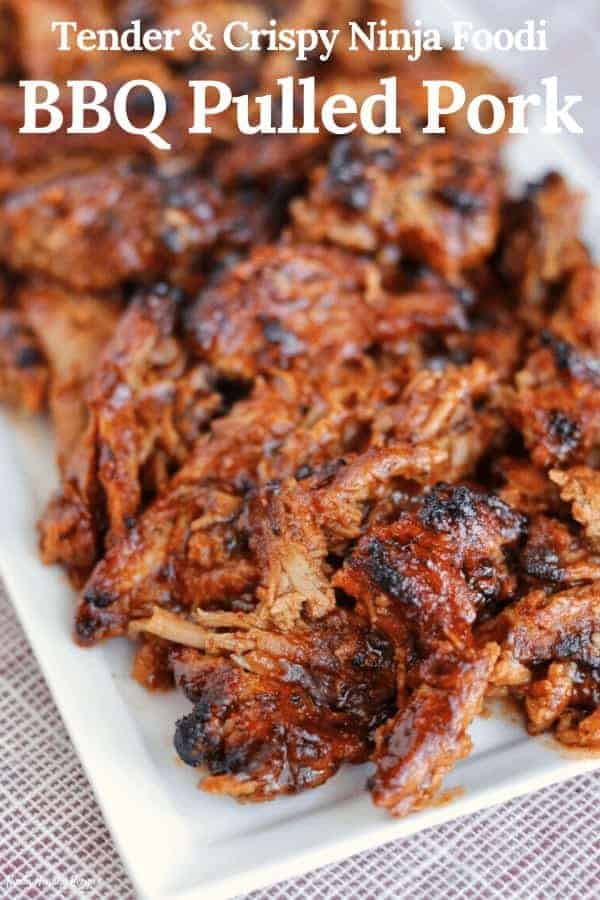
This pulled pork recipe transforms pork tenderloin into tender bbq pork with crispy edges in less than 30 minutes thanks to the Ninja Foodi’s pressure cooker and broil functions. This pork would work perfectly for pulled pork sandwiches, loaded baked potatoes, nachos, pasta bakes, and more.
In the post below, I’ll walk you through the recipe, ingredient modifications, and tips for using an Instant Pot or other cooking methods in case you don’t have a Foodi in your kitchen. And you’ll find a printable recipe card at the end of the post if you’re familiar with the Foodi and all its functions and want to get cooking!
How to Make Pulled Pork in the Ninja Foodi
You can break the recipe down into 5 simple steps:
- seasoning a pork tenderloin
- sear both sides using the Foodi’s sauté function
- pressure cook
- use the sauté function to thicken the remaining liquid before shredding the pork and mixing with more bbq sauce
- use the broil function to make crispy pulled pork
Step 1: Season with a Simple Pulled Pork Rub
- salt and black pepper
- paprika, dry mustard, and cumin
- brown sugar
I used zero-calorie Swerve Brown for the brown sugar. It’s only a tablespoon so the real deal is perfectly fine if that’s all you have on hand.
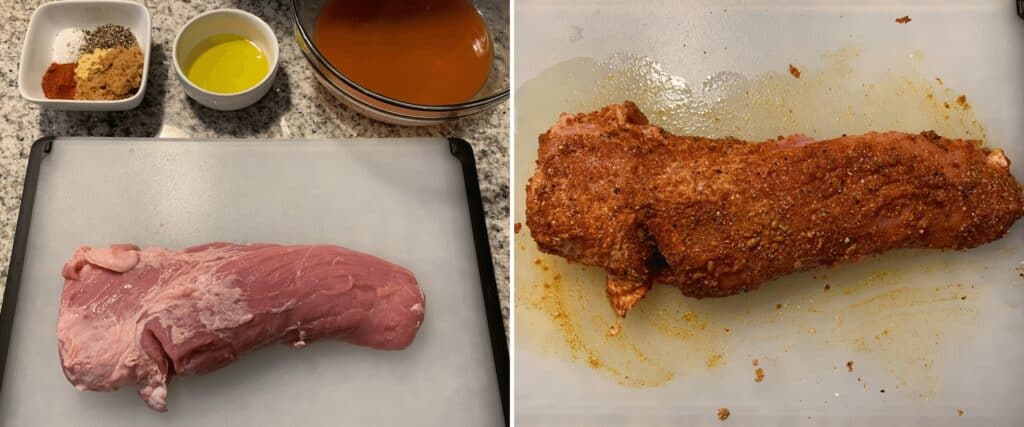
The recipe calls for a tablespoon of olive oil rubbed on the pork tenderloin before adding the rub. This is an important step for a few reasons:
- Helps the seasoning stick to the pork tenderloin a bit better.
- Since the Foodi has a raised center in its pot, oil tends to flow to the sides, making it difficult to sear proteins in the oil. Applying the oil directly to the pork solves this issue.
- Having a small amount of oil allows the spices to bloom instead of burn and create a great crust on the exterior of the pork tenderloin.
For a twist on the seasoning of your pork, you could use the seasoning blend and hot sauce glaze from our Traeger Smoked Pork Tenderloin.
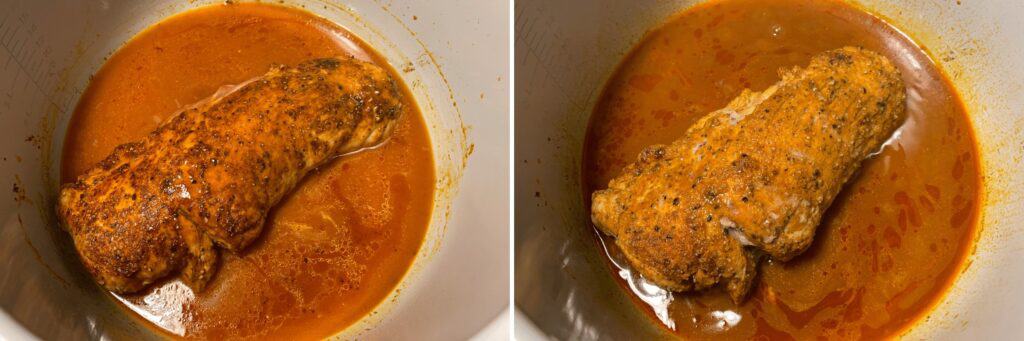
Step 2: Sear Both Sides of the Pork Tenderloin
Set the Foodi’s sauté function to HI and let the pot heat up. Once the pot is hot, add the pork tenderloin and cook for 2 minutes before flipping and cooking an additional 2 minutes.
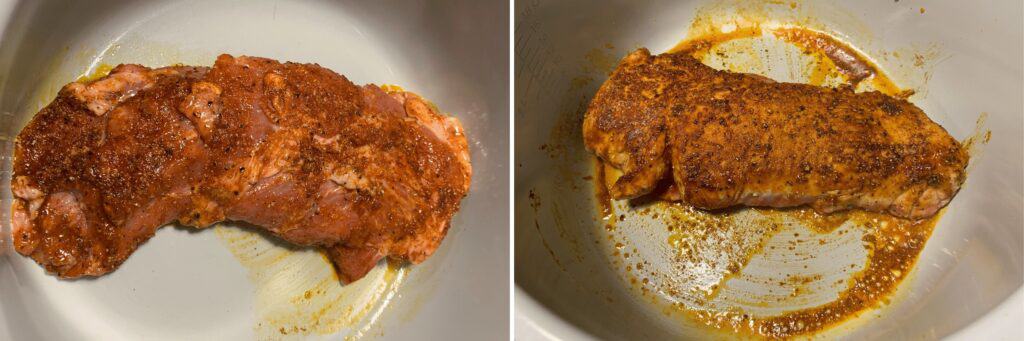
The photo on the right above shows what the pork tenderloin should look like after the first 2 minutes. If you notice your pork hasn’t developed a crust quite yet, the pot was probably still heating up. No worries—just cook it a bit longer!
Step 3: Seal and Pressure Cook
Once you’ve added the bbq chicken broth mixture, seal the Foodi and pressure cook on its HI setting for 10-12 minutes with quick release pressure. If you’re new to pressure cooking, quick release pressure simply means vent the pot as soon as it’s finished cooking.
On the time range, 10 minutes should do the trick for a longer, thinner tenderloin. The 12-minute cook time will be ideal for shorter, thicker tenderloins to make sure it cooks through in the center.
You want to make sure the pork is fully cooked to an internal temperature of 160-165F at its thickest point without over cooking. If your tenderloin is difficult to shred, it’s likely over cooked so reduce the cook time on your next run.
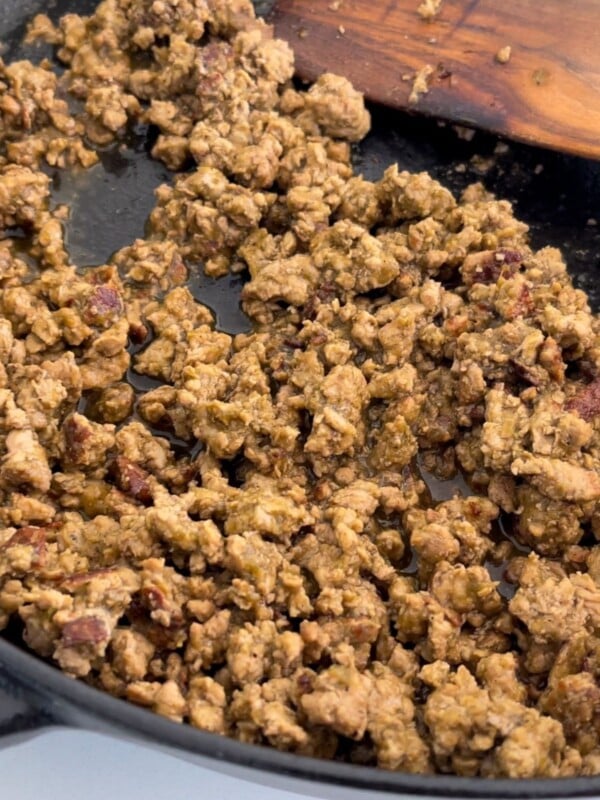
Step 4: Shred the Cooked Pork Tenderloin and Reduce the Remaining Liquid
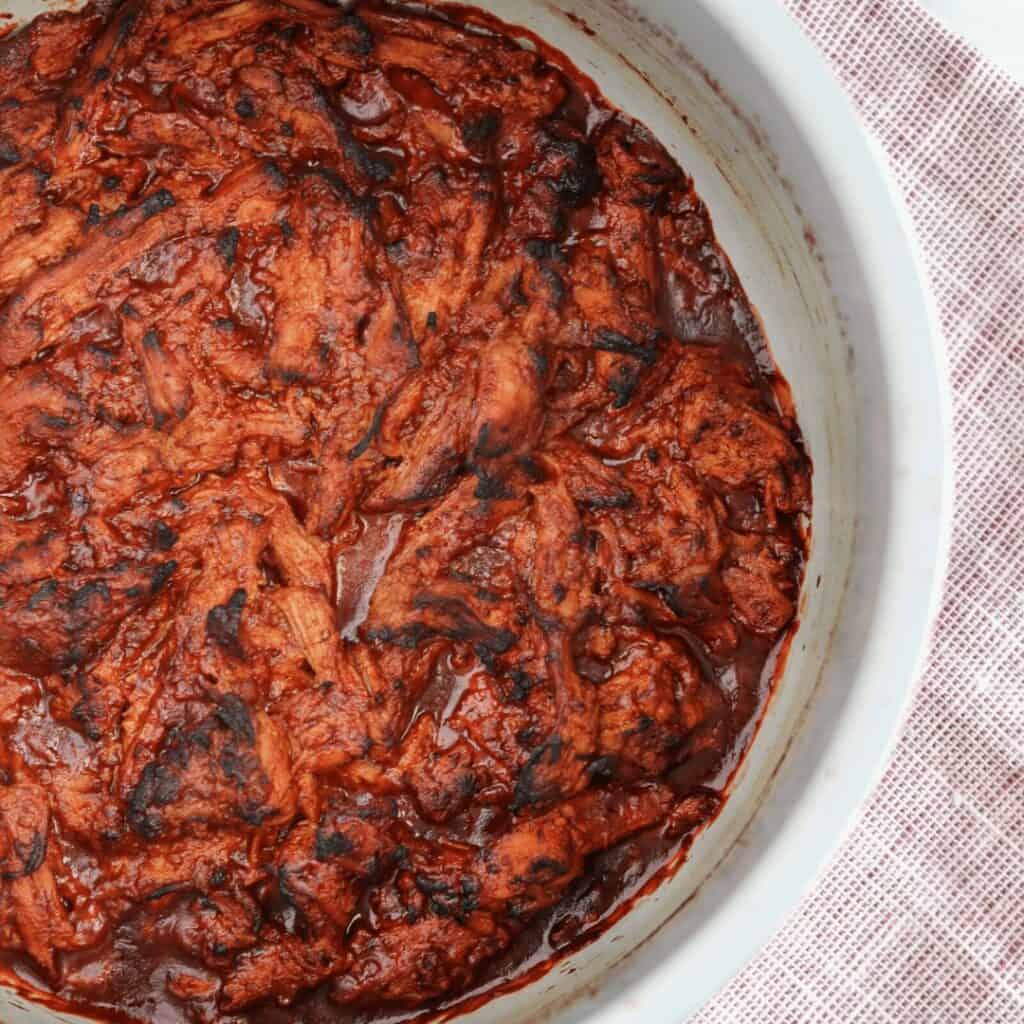
Transfer the cooked pork tenderloin to a bowl to rest and turn the Foodi’s sauté function on HI. Don’t shred the pork tenderloin right away. Letting it rest while the remaining liquid thickens will allow the proteins in the pork to relax, making it easier to shred and keeping juices inside the meat instead of the bowl.
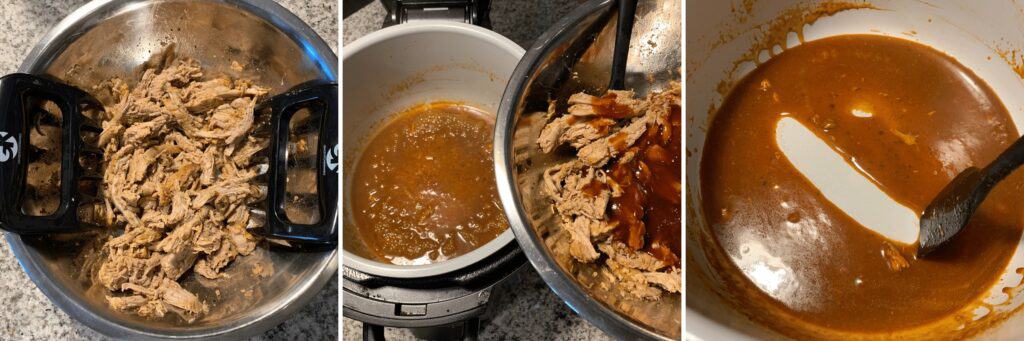
Once the sauce thickens and will leave a trail if you drag a spatula through it, turn the sauté function off and shred the pork tenderloin with forks or meat claws. I have the claws I use on my Amazon storefront, in case you’re interested.
Toss the pulled pork in some of the same bbq sauce you added to the chicken broth mixture and go back in the pot with the reduced sauce.
Note: If your remaining sauce is taking a while to thicken, you can add a 1:1 corn starch slurry like I used for my Ninja Foodi Pot Roast.
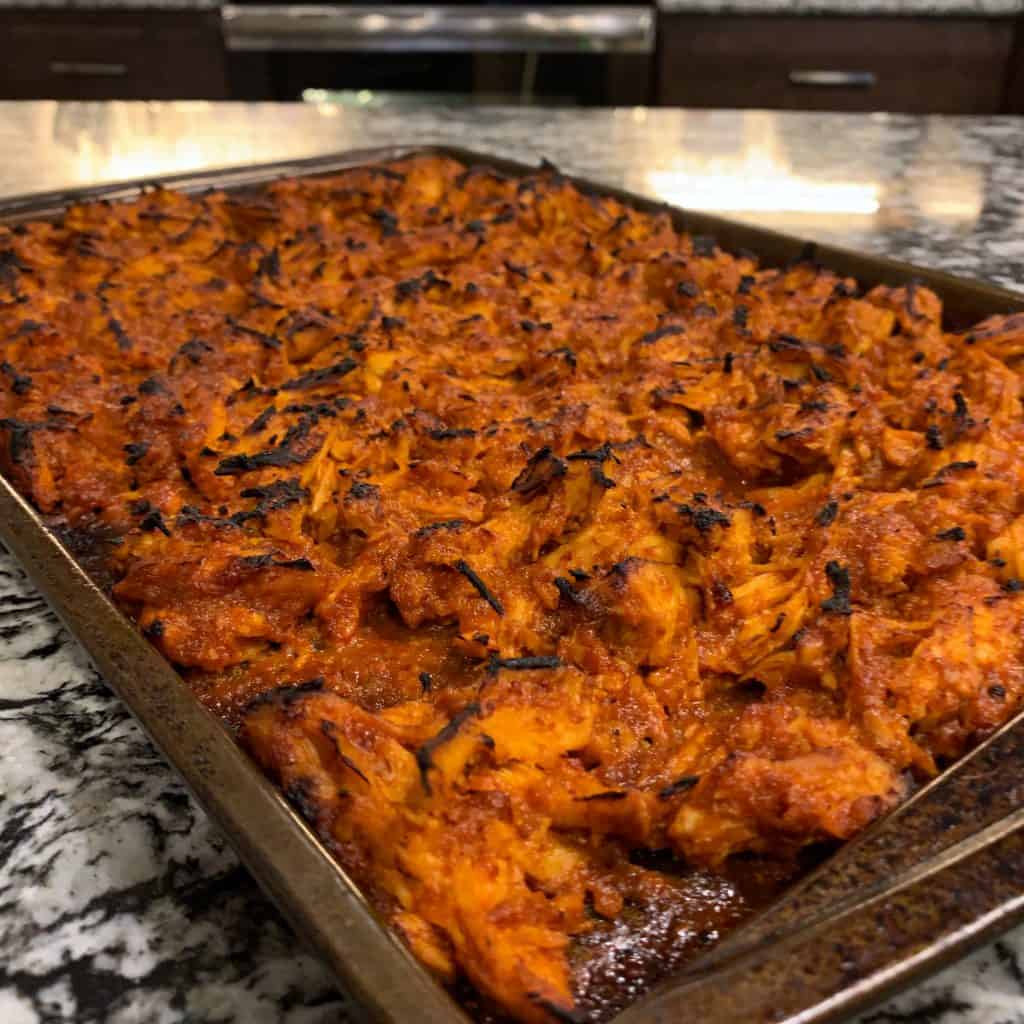
Step 5: Broil to Make Crispy Pulled Pork
Give the pulled pork a stir in the sauces and close the Foodi’s air crisping lid. Turn on the broil function for 10 minutes. You can extend the time by 3-5 minutes to get extra crispy pulled pork.

And that’s it. You’re ready to serve!
Pulled Pork Recipe Modifications
You’ll find answers to frequently asked questions below.
How can I double the recipe?
Yep, both my Ninja Foodi carnitas call for two 1-pound pork tenderloins.
I tested this BBQ pulled pork by doubling the pulled pork rub and olive oil for an extra 1-pound pork tenderloin. I seared both for the same time and used the same amount of chicken broth, bbq sauce, and hot sauce.
For pressure cooking, I tested 15 minutes and both tenderloins were between 170-180 degrees. So, I’d bet 12-14 minutes would be perfect.
I did notice two pounds of pork created more juices in the Foodi after pressure cooking. So I only added an extra 1/4 cup of BBQ sauce to the original 1/2 cup in the shredded pork.
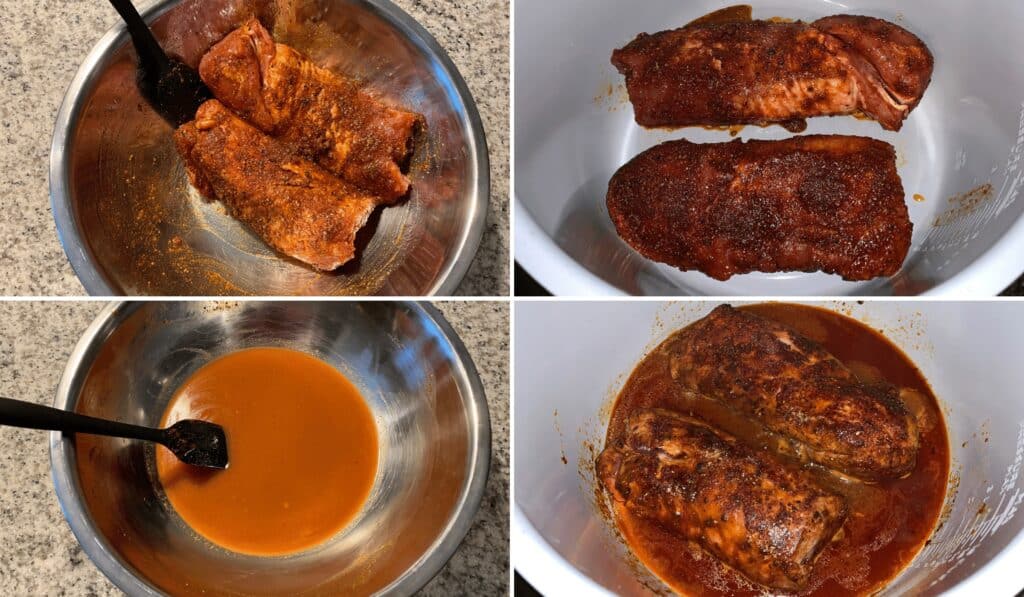
You can see another tip in the photos above—adding the pork tenderloins to a bowl for the oil and rub application step. Then mixing the chicken broth, bbq sauce, and hot sauce in the same bowl to make sure no flavor is left behind!
Since there’s a bit more pulled pork in the Foodi pot, you may want to stir a few times during the broiling process for even crisping. You could also broil in batches.
Can I make this pulled pork in a slow cooker?
You bet. I would still recommend searing both sides of the pork tenderloin in a large skillet before adding to a crockpot with the chicken broth, all of the bbq sauce, and hot sauce. Cook on low for 3-4 hours, high for 2-2.5 hours, or until the pork tenderloin reaches an internal temperature of 165F at its thickest point.
Can I use an Instant Pot?
Totally. Follow the recipe as-written and if you’re using a 6-quart Instant Pot, I’ve found it to have nearly identical pressure cook times to the Ninja Foodi.
For example, my Mexican shredded chicken thighs recipe had identical cook times in both the Foodi and Instant Pot.
How do I make crispy pulled pork without a Ninja Foodi?
Whether you use an Instant Pot or slow cooker, you can transfer the pulled pork after shredding and reducing the remaining liquid to an aluminum foil lined baking sheet and use your oven’s broil function for 3-5 minutes like I did in my pineapple chipotle crockpot chicken recipe. Extend the time as needed.
Don’t be like me. Aluminum foil makes clean up much easier!
Does it matter which BBQ sauce I use?
Nope, use whatever you want! The G Hughes sugar free BBQ sauce I used in my crispy brussels sprouts with bacon is a great lower calorie option.
Could I use this recipe to make BBQ pulled chicken?
You could oil and season chicken breasts or thighs and cook exactly the same way. Though you’ll probably want to reduce the cook time since the chicken will be a bit thinner and quick cooking than pork tenderloin.
Update: My pulled Instant Pot BBQ chicken thighs recipe calls for 2-3 minutes per side followed by a 5-minute pressure cook.
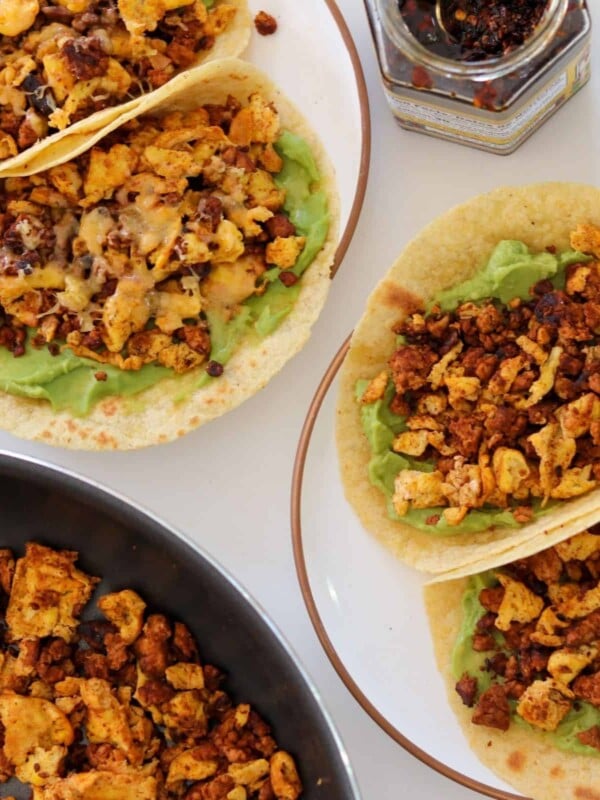
Serving Your Pulled Pork
I used this recipe to make pulled pork nachos, cast iron pulled pork pizza, and a pulled pork breakfast casserole. You could use it for all kinds of things, though! If you need some side ideas, check out my Ninja Foodi mac and cheese, Ninja Foodi baked potatoes or twice baked potatoes, or air fryer green beans.

Have additional questions about this Ninja Foodi Pulled Pork Recipe? Drop a comment below or join my free Facebook group to get some help from the 17k home cooks there.

The Best Ninja Foodi Pulled Pork
Ingredients
- 1 lb Pork Tenderloin
- 1 Tbsp Olive Oil
- 1/2 Tbsp Paprika
- 1/2 Tbsp Dry Mustard
- 1 tsp Kosher Salt
- 1 tsp Black Pepper
- 1/2 tsp Cumin
- 1 Tbsp Swerve Brown, or brown sugar
- 3/4 C 180mL Low Sodium Chicken Broth
- 3/4 C 192g BBQ Sauce, divided
- 2 Tbsp 30g Hot Sauce (optional)
Instructions
- Cooking the Pork Tenderloin
- Mix the salt, pepper, paprika, dry mustard, cumin, and brown sugar together in a small bowl. Mix the chicken broth, 1/4 C (64g) bbq sauce, and optional hot sauce in another bowl. Set aside.
- Rub or brush the olive oil on the pork tenderloin. Coat both sides of the pork tenderloin with the mixed spices.
- Turn the Foodi’s sauté function on its HI setting. Once the pot is hot (sizzles with a flick of water), add the pork tenderloin and cook for 2 minutes to develop a good sear on one side. Flip and cook for another 2 minutes. Add the broth mixture, seal the Foodi, and pressure cook on HI for 10-12* minutes with quick release pressure.
- Transfer the cooked pork tenderloin to a large bowl to rest.
- Shredding, Saucing, and Crisping
- Turn the Foodi’s sauté function on HI again until the remaining liquid has thickened to a sauce that leaves a trail when you drag a spatula across the pot, about 5-6 minutes.
- Shred the pork tenderloin with two forks, meat claws, or stand mixer with a paddle attachment. Pour the remaining 1/2 C (128g) of BBQ sauce and stir before adding back to the Foodi with the thickened sauce. Stir to fully coat the pulled pork in the sauces.
- Optional: Use the Foodi’s broil function for 10-12 minutes to make the pulled pork crispy.


Love this recipe, and so incredibly easy to make. I love that we can use the Foodi to crisp it up a bit if we choose. The BBQ chicken will always have my heart but this is definitely a close second! 🙂
Excellent – made today, the whole fam loved it and very macro friendly!
I’ve made this twice now in the crockpot and it turned out amazing both times! I did it on high for 4 hours and it stayed super juicy. Did one time broiling in the oven after and one not – both ways were great just depending on preference and how you are using the recipe. Couldn’t believe the macros with all the flavor!
I’ve made this twice now in the crockpot on high for 4 hours and it turned out great. I was worried it wouldn’t be as moist but it shredded perfectly! I broiled in the oven once and left it not broiled once. Both were great just depends on preference and how you are using it. Couldn’t believe the macros with how much flavor it packs!
This meal is so easy to make and a fan favorite! It’s great doe busy nights where you don’t have a ton of time and it usually makes leftovers so I really can’t complain! Not to mention it’s so dang good! Highly recommended giving it a try!!
I’m making this tonight. A temp of 165F seems “well done” for a pork tenderloin. According to Google, 145F is the idea temp for pork because when you overcook it is dry. I may try playing around with it. I’m a newbie home cook, so definitely not an expert. Just wondering if 165F was too tough/dry for anyone else?
It’s up to you! If you’re planning to shred and broil anyway, food safety won’t really be a concern. That said, I’ve never had any issues with pulling/shredded or toughness when cooked to 165ºF with this one.
I will never cook pork using a different recipe again. My entire picky-eating-family loves this recipe. Makes great leftovers and can used in soooo many different ways!
When u say 10-12 min pressure cooking does that mean 10-12 min after it reaches the pressure point or is 10 -12 min total?
That’s 10-12 minutes after the pressure cooker comes up to pressure.
Very good recipe!! However, it took about 45 minutes to cook in my pressure cooker. The tenderloin was only 1.13lbs so I’m not sure why, but I’ll definitely be cooking this again!!