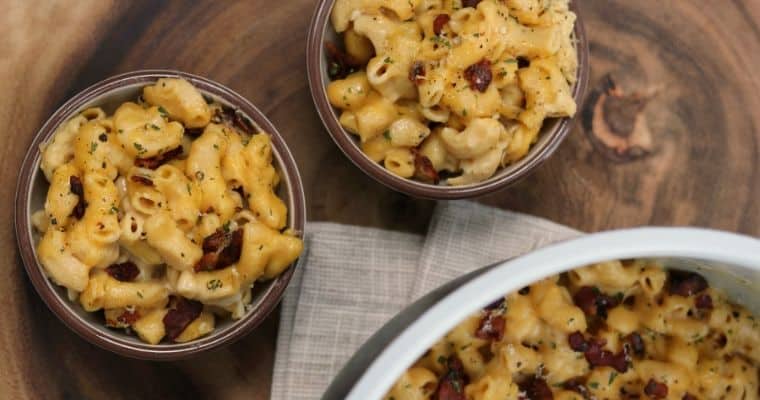
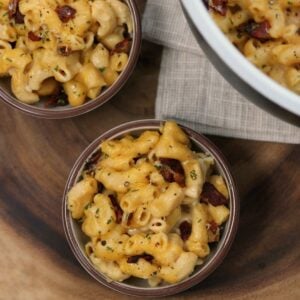
This one-pot mac and cheese recipe combines higher protein chickpea pasta with crispy bacon and garlic, cheddar and parmesan cheese, and a blend of spices. Each serving has 8 grams of protein with just 10 grams of carbs and 120 calories.
It’s super easy to make in the Ninja Foodi, but you can do it on the stovetop if you haven’t joined the Foodi clan yet. I’ll walk you through the recipe below and include a printable recipe card at the bottom of the post.
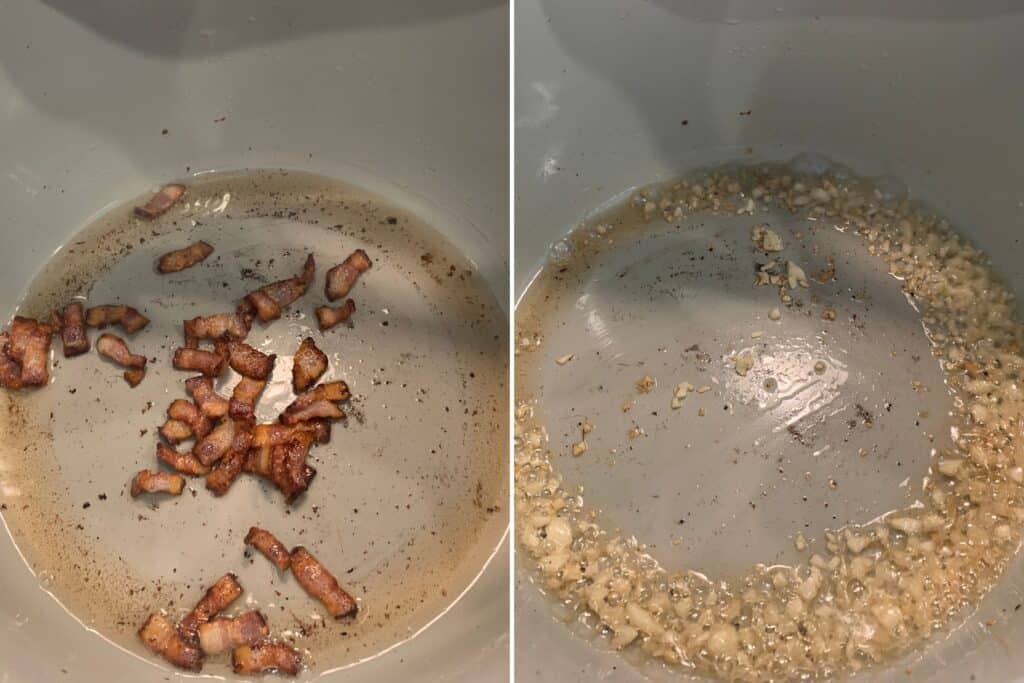
Use the sauté function on the Ninja Foodi to cook a couple slices of bacon and minced garlic.
Like I mentioned in my Ninja Foodi breakfast pizza recipe, cutting the bacon up before cooking is a great way to get fast, evenly cooked bacon. You could totally cook whole slices and crumble them up after cooking, though!
Don’t miss the instructions on turning the Foodi off once the bacon is cooked. Otherwise, you might burn your garlic before you have time to get the broth in. You want it golden brown, and the bacon grease will make quick work of that.
And in case you wanted to up the protein, you could try adding chicken breast like in my green chile chicken mac and cheese. I’d cook the chicken in the bacon grease and add it back to the pot with the bacon at the end.
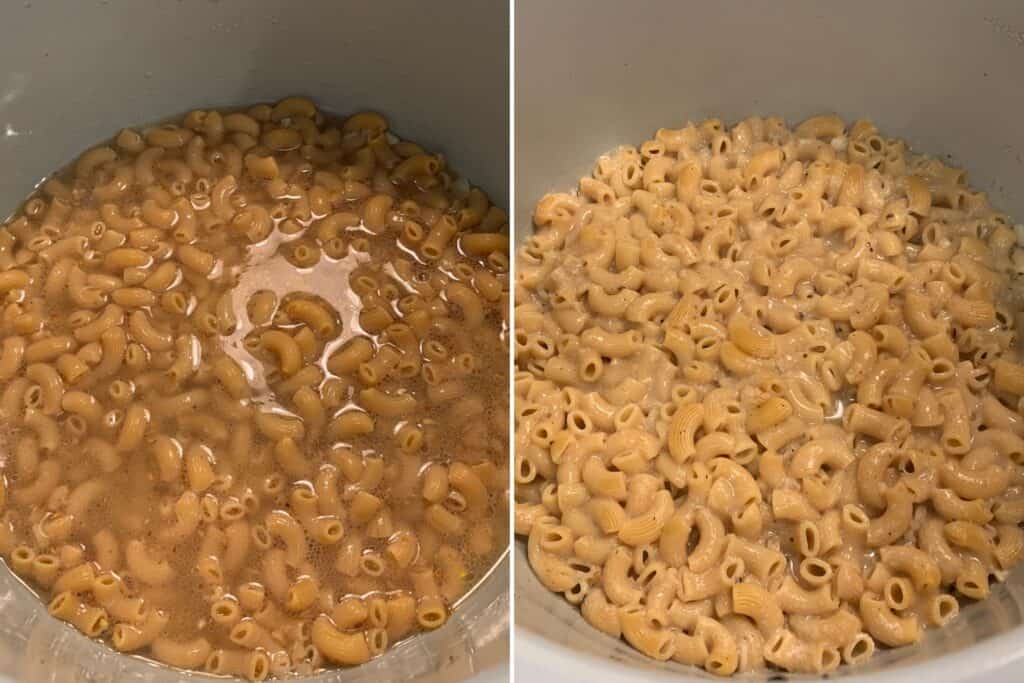
Add 2 cups of chicken broth and 8 ounces of dry pasta. Pressure cook on HI for 3 minutes and vent immediately.
I’m sure you already know I used Banza’s chickpea pasta for this. It’s the same pasta I used for my queso mac and cheese, homemade easy mac, and buffalo chicken mac and cheese. As long as you don’t overcook it, this stuff is one of the best lower carb pasta options out there!
If you’re using the real deal, the cook time and broth required should be about the same.
Update July 2024: I recently used a new high protein mac and cheese product, Goodles, to make a great slow cooker chili mac. Definitely worth checking out!
Pressure cooking note: I use a 6.5-quart Ninja Foodi. Different sizes or brands of pressure cookers may require slight modifications. If you’re using a larger Foodi, for example, you may need to double the recipe to account for the added surface area.
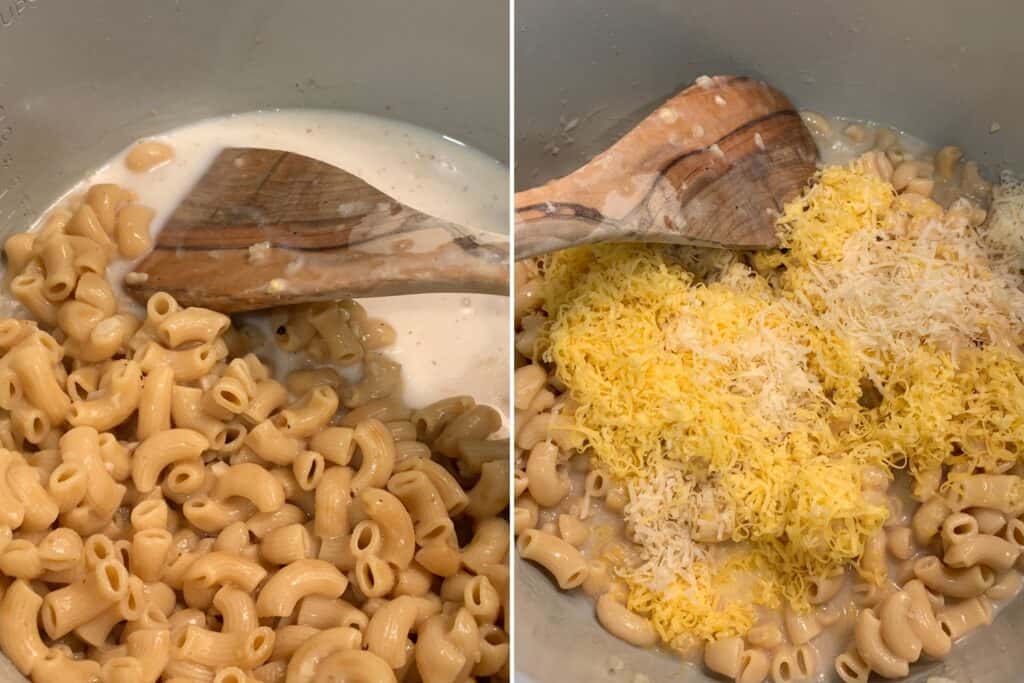
Add milk and gradually stir in 4 ounces of cheddar and 1 ounce of parmesan.
The recipe calls for almond milk, but any milk will do. There’s a good amount of fat in the recipe as-is. So the almond milk is a great way to provide moisture without adding any more fat.
As for the cheese, grate it straight off the block for best results. The packaged stuff will suffice for something like my Ninja Foodi cheesy bread or air fryer pizza, but this mac and cheese will work best with maximum meltability.
If you need a cheddar substitute, you might try a jack cheese or gouda.
Add cooked bacon and optional spices, cover with another 2 ounces of cheddar. Use the Foodi’s broil function for 2-3 minutes to achieve perfection.
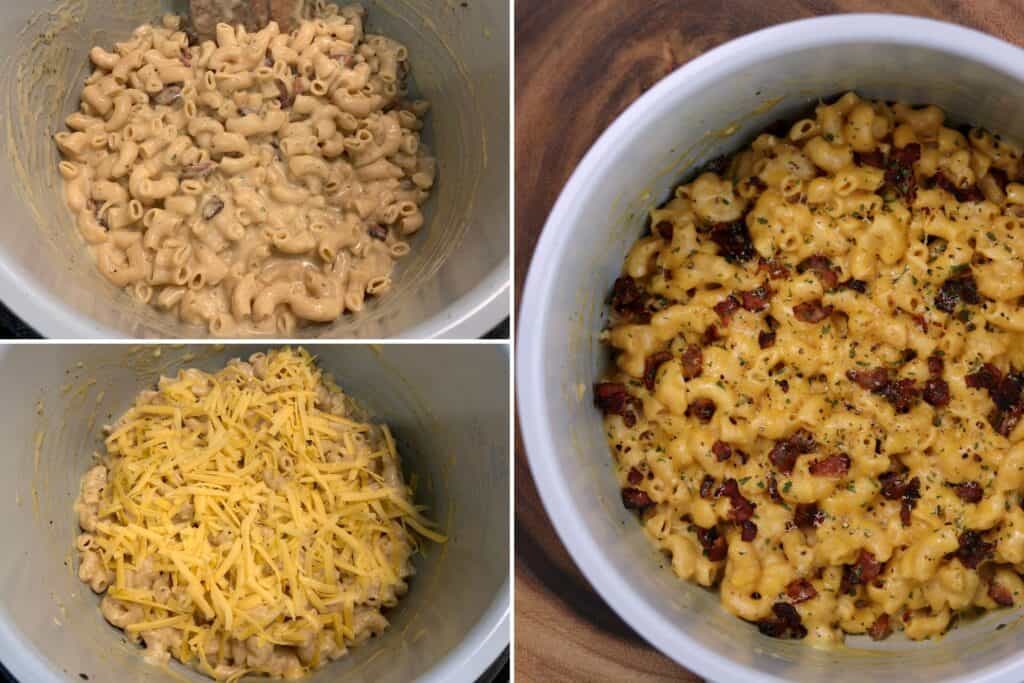
You can either throw all 6 ounces of cheddar into the mac and cheese to serve right away or reserve 2 ounces to throw on top and broil. You can even reserve some or all of the cooked bacon to use as a topping. It’s hard to go wrong either way—I just like the added texture from the broiled cheese on top.
As for the optional spices, I would recommend tasting the mac and cheese before adding the extra 2 ounces of cheddar on top and season to taste. I’d say the amounts I’ve given in the recipe are on the mild side to keep it purely creamy mac and cheese with bacon, but you could creative.
Nutrition Facts Notes
I divided the recipe into 14 smaller servings so you’d have more flexibility in scaling up your servings. If you make recipe modifications and need to calculate your serving sizes, weigh the entire pot of mac and cheese. The 6.5-quart Ninja Foodi’s pot should weigh about 710 grams. Subtract that from your total and you’ve got the weight of your mac and cheese. Portion accordingly.
To reduce the fat content, you could probably get by with less cheddar. You could also try the infamous cheddar powder as a sauce like in my Ninja Foodi cheeseburger soup or cheesy air fried potatoes.
That should cover it. If you have a recipe question I didn’t cover, leave a comment at the bottom of the post. And if you enjoy this Ninja Foodi mac and cheese recipe, leave a review and let me know!
Ninja Foodi Mac and Cheese with Bacon
Ingredients
- 8 oz Banza Pasta Elbows, or your choice of pasta
- 2 slices Bacon, cut into strips
- 3-4 cloves 15g Garlic, minced
- 2 C 480mL Chicken Broth
- 1 C 240mL Unsweetened Almond Milk (or your choice of milk)
- 6 oz Freshly Shredded Cheddar Cheese, divided (save 2 oz for the top)
- 1 oz Freshly Shredded Parmesan
Optional Seasoning
- 1 tsp Dry Mustard
- 1/2-1 tsp Parsley Flakes
- 1/4-1/2 tsp Black Pepper
- 1/4 tsp Ground Nutmeg
- 1/4 tsp Salt, to taste
Instructions
- Use the Ninja Foodi’s sauté function to fully cook the bacon. Once cooked, transfer the cooked bacon to a paper towel.
- Turn off the Foodi and add the garlic to the remaining bacon grease. Cook until the garlic starts to turn golden brown, about 30 seconds, before adding the chicken broth.
- Add the uncooked pasta to the broth and stir to create an even layer, submerging all of the pasta.
- Seal the Foodi and cook on HI pressure for 3 minutes with quick release pressure (vent immediately).
- Remove the lid and add the milk to the pasta. Gently stir while gradually adding the shredded cheese. Reserve 2 ounces of cheddar for the top. Once everything is melted and creamy, add the cooked bacon back to the mac and cheese along with the dry spices.
- Top with the remaining 2 ounces of shredded cheddar and use the Foodi’s broil function for 2-3 minutes until the cheese is melted to your liking. (You can also reserve the bacon for adding as a topping after broiling.)

If you want to double the amount of pasta used, do you need to double the liquid and PC time?
You’ll want to double the liquid or at least add enough to cover the pasta in the pot. I would keep the cook time the same, though.
Thank you!
Is this supposed to be 4 servings? Surely, not 14, right?
14 servings (1/2 cup or 75 grams each)
This is where I fell in love with banza pasta. This recipe was so good! Thank god it’s low in calories and everything because I certainly indulged. It was creamy, delicious, and fast! Will definitely make again!
So good and easy!! Might have added too much nutmeg but still good! And I had to use packaged cheese cuz I missed the note on it being better with freshly grated… but again, still good!
Would this be ok to freeze?
Chickpea pasta isn’t the best for freezing/reheating. I don’t think I’d recommend it.