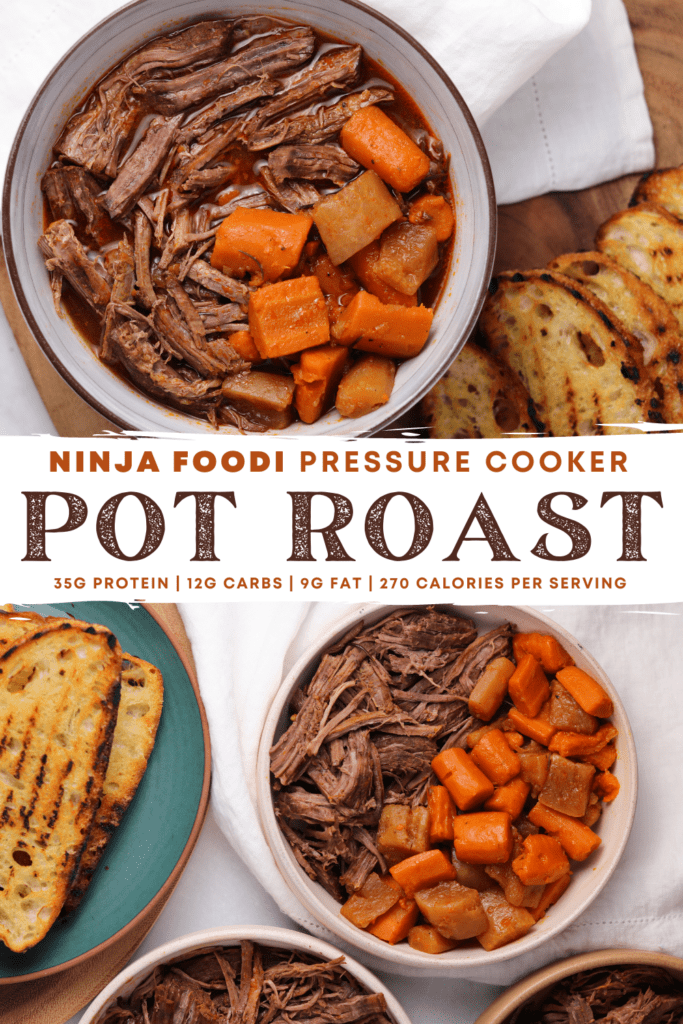
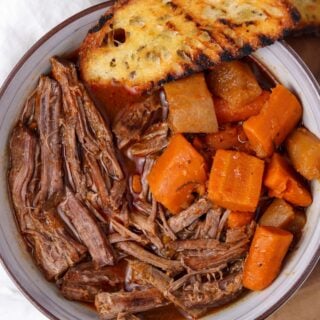
Whether you’re brand new to cooking in the Ninja Foodi or a seasoned veteran, this healthy pressure cooker pot roast is the perfect recipe for next week’s menu. It turns lean cuts of beef into a melt in your mouth roast with super flavorful vegetables. And each serving is packed with 35 grams of protein with only 12 grams of carbs, 9 grams of fat, and 270 calories.
Best Cuts for a Healthy Pot Roast
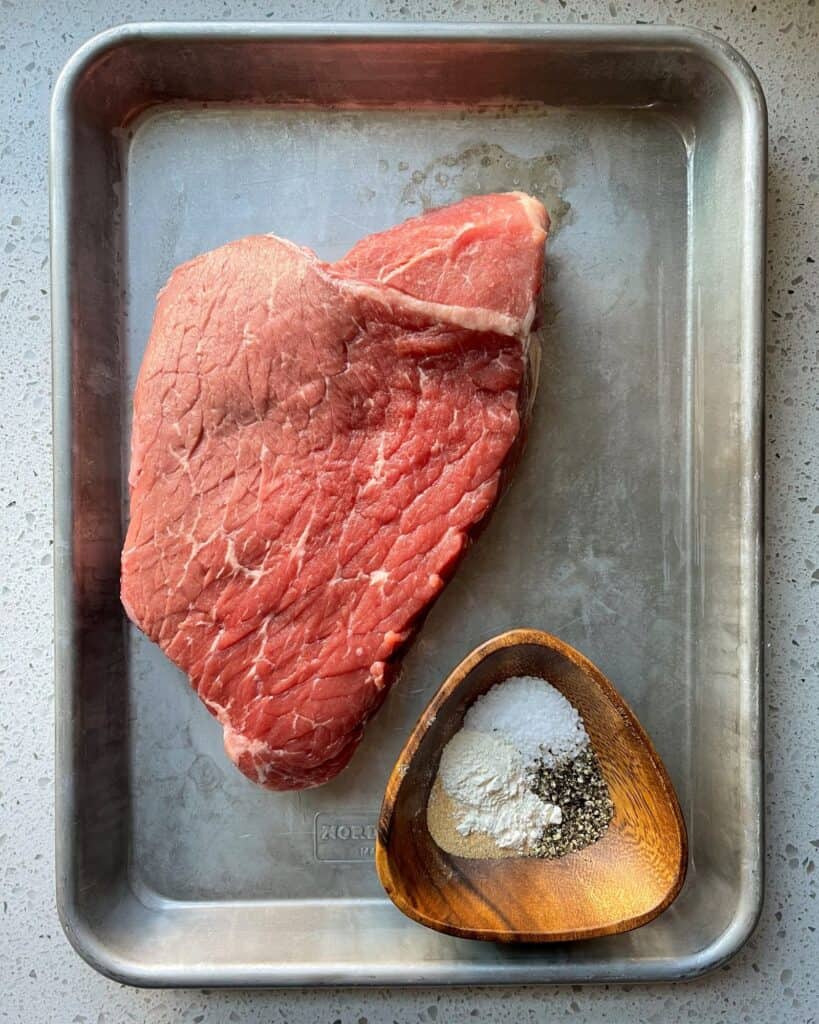
The choice of meat for pot roast is typically chuck roast, but we’re looking for a leaner cut of beef to make a healthy pot roast. And when it comes to lean roast meat, two options stand out.
- Eye of Round Roast: 115 calories, 23g of protein, and 2g of fat
- Bottom Round Roast: 140 calories, 22g of protein, and 5g of fat
Compare these to chuck roast, which has 175 calories, 19g of protein, and 11g of fat in the same 100g (raw) portion. Nutrition data pulled from the USDA Food Database.
I’ve also used another great option in chuck tender roast for my Traeger smoked pot roast, which has 24g of protein and 6g of fat.
And this goulash soup is made with another relatively lean cut in flank steak, in case you need a fourth option.
I tested both roasts and found the bottom round worked the best. The small amount of extra fat goes a long way in terms of flavor and tenderness. That said, the eye of round wasn’t that far off.
Does Pot Roast Get More Tender the Longer It Cooks?
Pot roast is interesting because we’re cooking beef to a point where collagen (a protein) melts or dissolves, transforming to gelatin. This turns an otherwise tough piece of meat into a fall-apart-tender roast. The fat content obviously helps, but this style of cooking is perfect for lean cuts like eye of round or bottom round roasts.
More on this below in the pressure cooking section.
Pot Roast Seasoning Rub
As you’ll see in the next section, I left onion and garlic out of the vegetable roundup and put them into the seasoning blend via garlic and onion powder. In addition to salt and pepper, that’s all the roast really needs. The recipe calls for adding fresh rosemary sprigs during pressure cooking, but you could add dried herbs to the seasoning blend if you’d like.
Seasoning note: Pat the roast dry with paper towels before seasoning and be sure to add the seasoning to your roast first thing before you start anything else. This will give it time to “melt” into the roast.
Low Carb Vegetables for Pot Roast
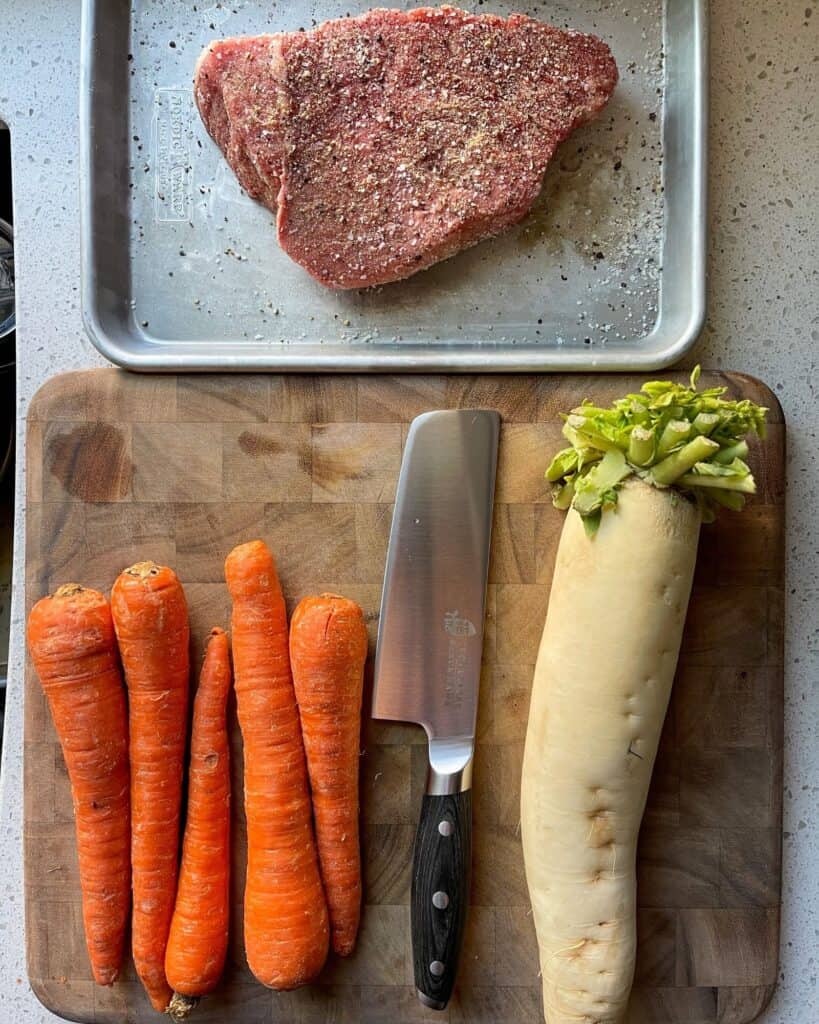
I’m sure you’re familiar with the classic pot roast combo of carrots and potatoes. With this recipe, however, I wanted to incorporate other lower carb vegetable options. The recipe calls for a daikon radish (pictured above), but I tested batches with quartered scallions and halved garlic cloves, turnips, and parsnips. You could use smaller red radishes like those in my air fryer roasted radishes or keto cheeseburger skillet.
Or you could go with the classic potatoes and carrots. You really can’t go wrong here.
Whatever you choose, you’ll want to roughly chop them into rather large pieces, about 2″ or so. Since the vegetables will pressure cook alongside your Ninja Foodi pot roast the entire time, smaller pieces may get a little mushy.
Oil in the Pot or on the Meat?
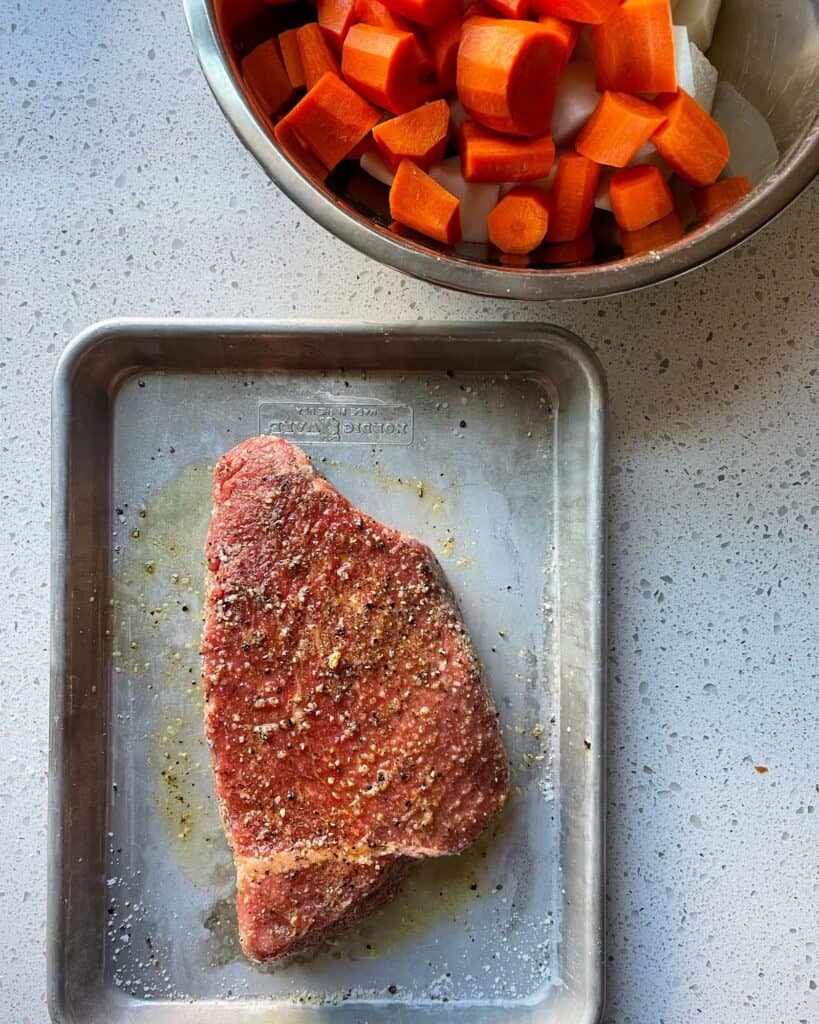
I like adding oil directly to meat before searing, especially in the Ninja Foodi. Because the pot is slightly elevated in the center, oil tends to collect around the edges. Coating the roast in a little oil before adding to the pot ensures even oil distribution on the surface and helps the seasoning stick to the roast. This also saves the amount of oil needed, saving calories.
If you’ve made my Ninja Foodi Mexican chicken thighs or Instant Pot BBQ Chicken, you might be wondering why the seasoning goes on before the oil instead of adding the oil and seasoning simultaneously. Either method works, but I like to give the salt time to dissolve and work its magic on the surface of the roast without any interference from the oil. With the smaller, faster cooking boneless chicken thighs that’s not as much of a concern.
Browning the Roast in the Ninja Foodi
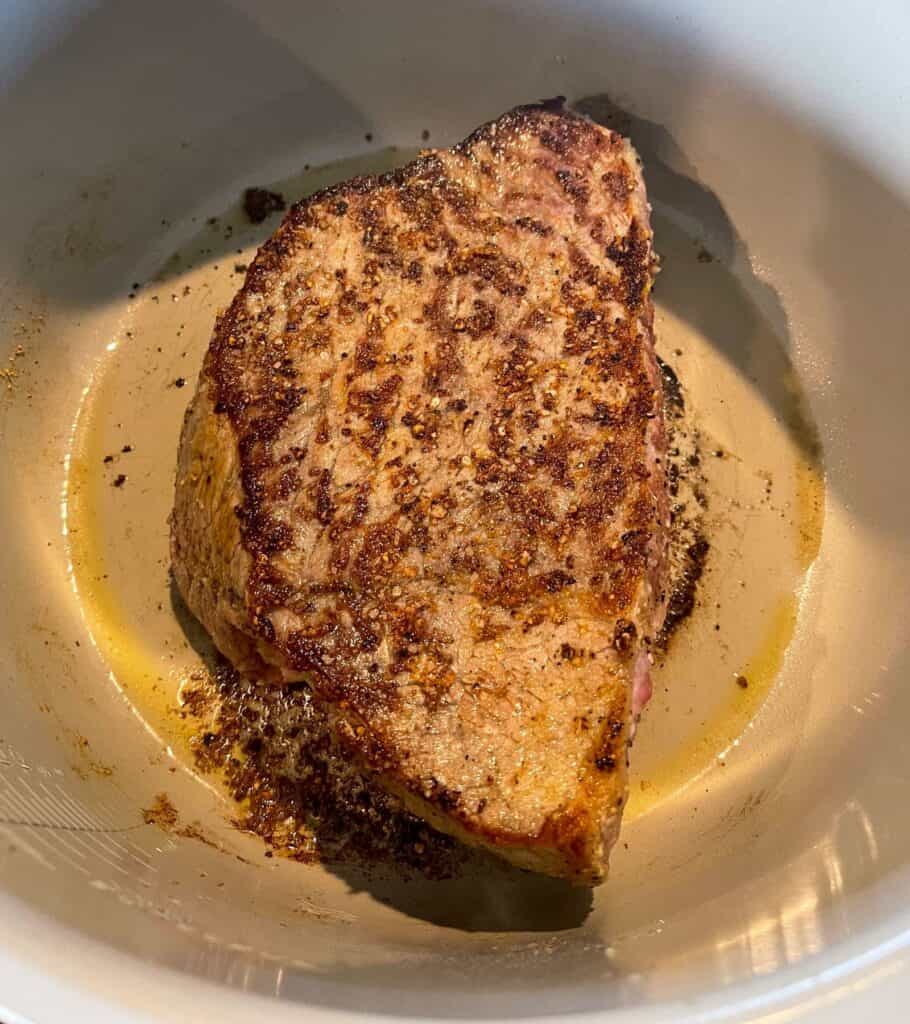
You want to get a golden brown crust on your roast. Two tips for achieving the Maillard reaction:
- Hot is good. The Ninja Foodi pot should be fully heated before adding the meat. Allowing the roast to rest at room temperature while you prep means it won’t cool the pot as much.
- Press down when adding the meat to create contact points, then leave it alone. Don’t readjust the roast once a side is down. Let it brown.
If you notice any fond in the pot is getting too dark or you smell any burned bits, use a spatula to scrape it off before browning the remaining sides of the roast. You’ll add another tablespoon of oil for the vegetables in the next step so if you need to add some to help with browning, go ahead.
Adding the Vegetables
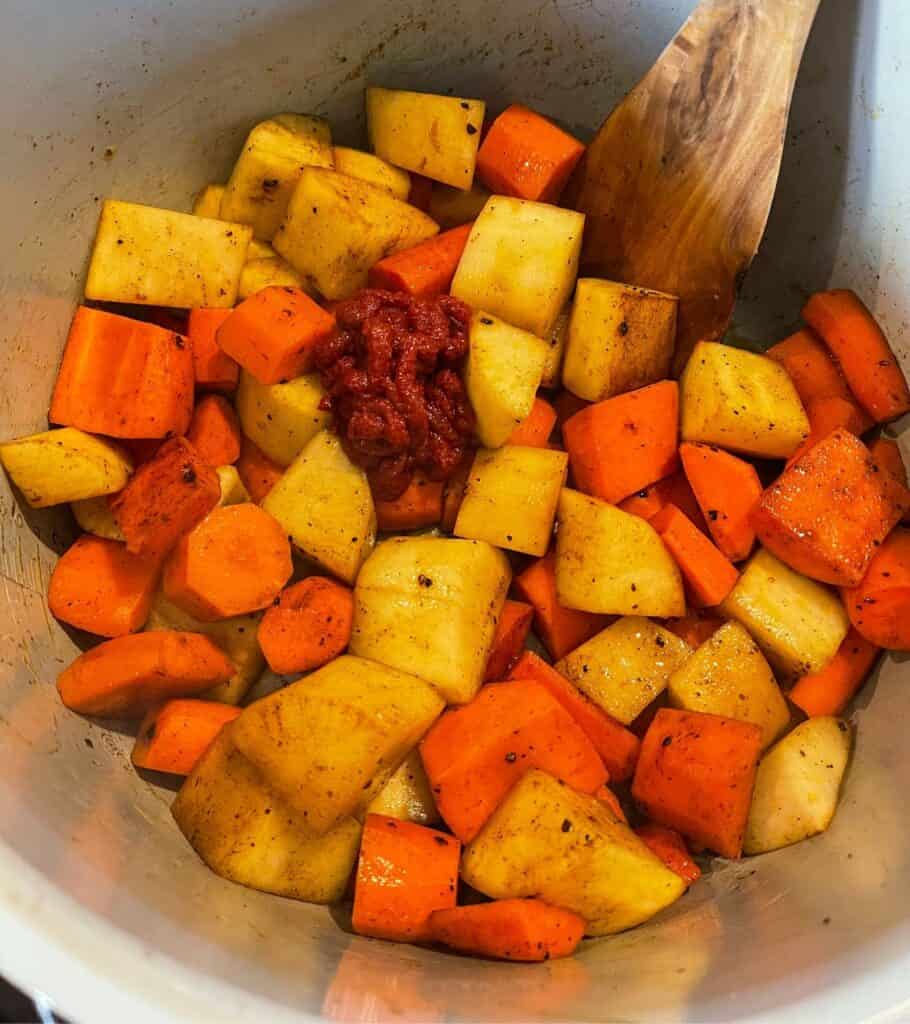
Once the roast is browned on all sides, set it aside and add your vegetables. Be sure to scrape all the fond and crispy bits off the bottom of the pot. You’ll add tomato paste to the vegetables and stir everything together until the vegetables are fully coated. This will only take a few minutes.
With the typical pot roast, you might add something like red wine at this stage. You could go that route with about a half cup of wine, but I used a combination of a cabernet sauvignon red wine vinegar and Worcestershire sauce.
The Pressure Cooker Pot Roast
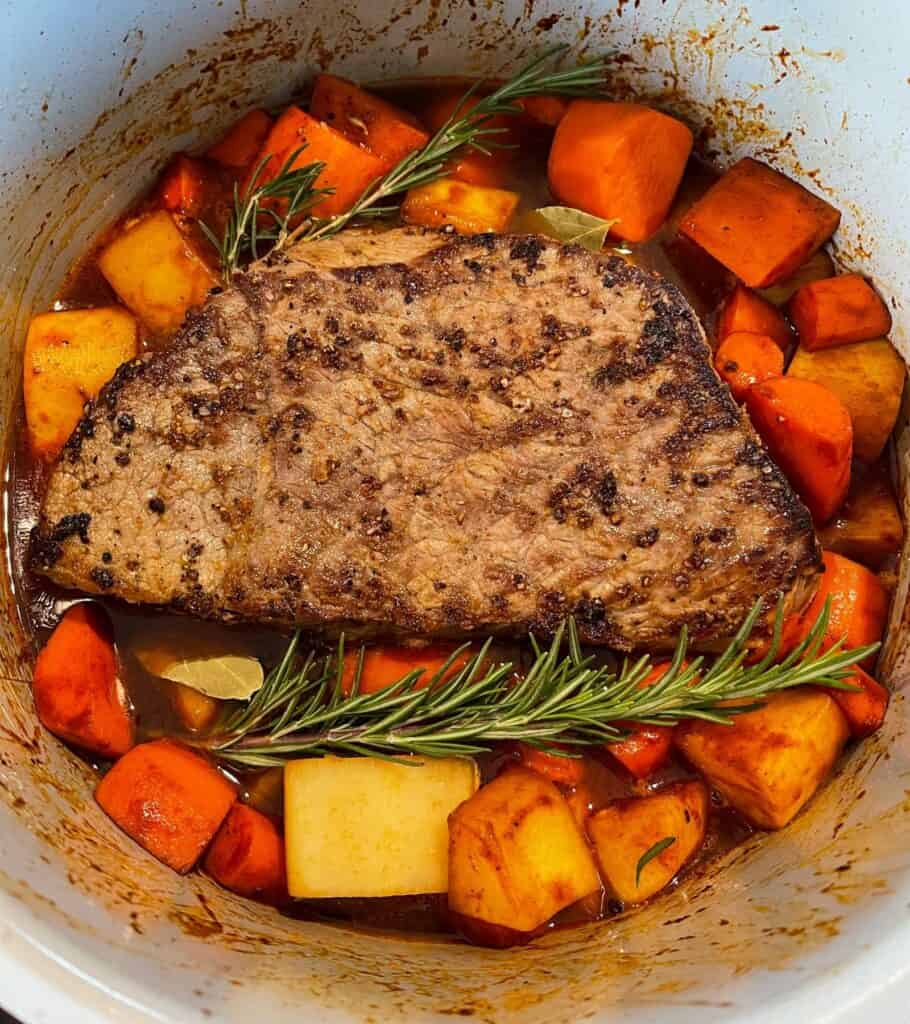
Once all the red wine vinegar and sauces forms a thick red coating on the vegetables, turn off the Foodi. It’s time to add the roast back to the pot along with some beef broth or a braising liquid, and pressure cook. You don’t want the meat fully submerged, just partially in the liquid.
I used the 6.5-quart Ninja Foodi. If you’re using a larger Foodi or pressure cooker, you may need more or less braising liquid. Adjust as needed until the bottom of the roast is just below the liquid.
The recipe calls for rosemary sprigs and bay leaves, but you could swap it out for thyme or any other herbs you prefer.

How Long to Pressure Cook Pot Roast?
In my testing, I’ve found 90 minutes for a 2.5-pound roast and 80 minutes for a 2-pound roast to be right on the money in both the Ninja Foodi and Instant Pot. You may need to extend the cook time for larger roasts. Or you might consider cutting them into smaller pieces. That would make browning the roasts easier as well.
As a troubleshooting tip, if your roast is tough and not falling apart with the press of a fork, you should probably seal your pressure cooker and extend the cook time. I’ve seen plenty of pressure cooker pot roast recipes with cook times in the 30-minute range, and my roasts were barely up to temperature at that point.
What about over cooking? You run the risk of your pot roast being a bit dry when over cooked, but I didn’t experience a dry pot roast in any of my test batches with long cook times.
Optional: Thicken the Pot Roast Gravy
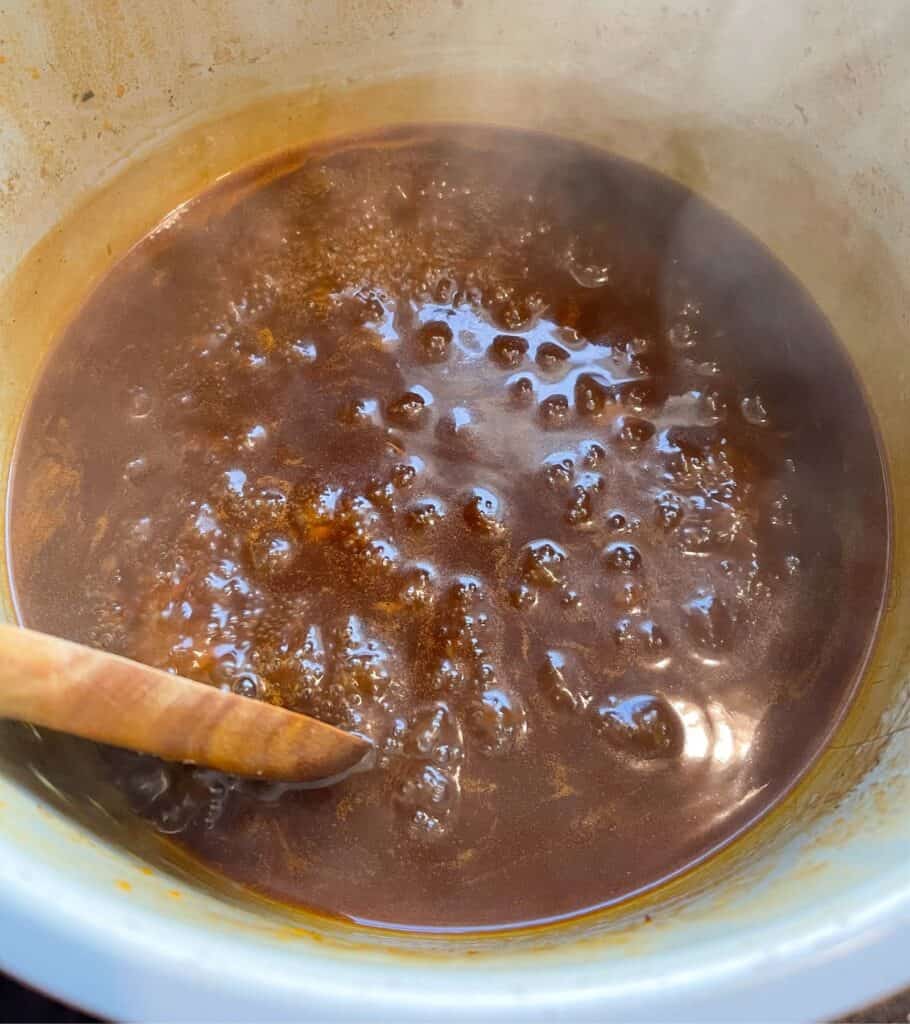
I think the more traditional method of serving pot roast is with gravy, but I quite like serving it with the thin broth and some crusty bread to soak everything up. An early inspiration for this recipe was a video from Inga of About to Eat where she made a chuck roast and root vegetable roast, serving it with the thin broth.
If you’d rather have a gravy, however, the Ninja Foodi makes life easy. You can turn on the sauté function and stir in a corn starch slurry (two tablespoons of both corn starch and water). Within 6-8 minutes you should have a gravy that coats the back of a spoon.
Want to use something else? Here are corn starch substitutes for cooking and baking.

What to Serve with Your Ninja Foodi Pot Roast
One of the great things about pot roast is that all the components are right there in one pot. You have your meat and veg. What else do you need?
I would keep it simple with some form of bread. To keep it low carb, you could make something like these keto bread rolls. Or if you have the carbs to spare, you could make healthy whole wheat bread rolls. There are also plenty of healthy bread options in stores these days, if you’d like to take a shortcut.
Since making my roasted tomato and whipped feta dip, I’ve been on a kick of grilling fresh bread brushed with olive oil. If you have a grill pan, you can’t go wrong there.
If you go the radish and low carb vegetables route for your pot roast and have some extra carbs to play around with, you could make some healthy mashed potatoes or twice smoked potatoes.
However you end up serving your Ninja Foodi pot roast, I’d love to hear about it. Come back and let me know in a comment or recipe review. And if you have any recipe questions I missed, you can leave them in the comments below.
Ninja Foodi Pot Roast
Ingredients
- 2.5 pound Eye of Round or Bottom Round Roast, fat trimmed
- 1 tablespoon Kosher Salt
- 1 teaspoon Garlic Powder
- 1 teaspoon Onion Powder
- 1/2-1 teaspoon Black Pepper, to taste
- 2 tablespoons 32g Olive Oil, divided
- 5 medium Carrots, peeled and roughly chopped (18 oz total)
- 1 large Daikon Radish, peeled and roughly chopped (18 oz total)
- 2 tablespoons 30g Tomato Paste
- 2 tablespoons 30g Red Wine Vinegar
- 1 tablespoon 15g Worcestershire Sauce
- 2 cups Beef Bone Broth
- 2 sprigs Rosemary
- 2 Bay Leaves
For Gravy
- 2 tablespoons Corn Starch
- 2 tablespoons Water
Instructions
- Pat the roast dry with a paper towel. Mix the salt, pepper, garlic, and onion powder together and season the roast. Set aside while preparing the vegetables.
- Turn on the sauté function of your pressure cooker and fully heat. Once hot, drizzle 1 tablespoon of olive oil over the roast and evenly coat. Add to the pot and sear for 2-3 minutes per side to brown, searing the sides for 30-60 seconds as well. Set aside. (Scrape any fond that’s at risk of burning off the pot while browning the roast.)
- Add the remaining 1 tablespoon of olive oil to the pot and add the carrots and radish. Stir everything together and cook for 2-3 minutes to develop a little color. Add the tomato paste, cooking until fragrant and the vegetables are coated.
- Add the vinegar and Worcestershire sauce. Fully deglaze the pot and turn off the Foodi once the vegetables are coated in a thick red sauce.
- Push some of the vegetables in the center slightly to the sides and place the roast on top. Some veggies should still be under the roast. Pour the broth around the edges. Don’t stir but make sure the bottom of the roast is submerged in the liquid. Add the rosemary and bay leaves to the broth.
- Pressure cook for 90 minutes on high and vent immediately. The roast should fall apart and easily shred. Remove the rosemary stems and bay leaves. (See post above for different roast size cook times.)
- If you’d like to turn the remaining liquid into a gravy, transfer the roast and vegetables to a bowl and use the sauté function to reduce the liquid. Add a 2 tablespoons corn starch + 2 tablespoons water slurry to help thicken.

I’ve never had a pot roast with so much flavor! I swapped in potatoes and it worked great. A phenomenal upgrade from my dads roast I would have to eat with ketchup. Highly recommend!
So, I’m not going to lie. I’ve been traumatized using the pressure cook feature of my ninja foodie after two botched attempts prior of pot roast and spaghetti. However, we were sick yesterday and missed thanksgiving with our family so I threw this together. We are living our best YOLO lives so we used a fattier cut of meat and added potatoes. Due to the aforementioned pressure cook trauma, I seared my roast and veggies on the stove first then transferred to the ninja. We absolutely LOVED the pot roast. The meat was flavorful and super juicy. It’s hard to mess this one up! We had it for left overs today. Thanks for saving thanksgiving. Oh, and I didn’t have those leaves you mentioned in the recipe that came our prior to serving. Still delicious!
This was my first recipe from the Woodruffs, and I was amazed! I used the eye of round, carrots, and acorn squash that was on its way to the garbage because I had no idea how to cook it. Holy cow! The meat was tender and juicy, the carrots still had a delightful taste and texture, and the squash could have been mistaken for sweet potatoes. You will not believe how easy it is to pull this recipe together and sit down to a protein-rich smorgasbord of flavors. I’m excited to try more recipes!
About how long to cook if it’s a slowe cooker? And temp – low, medium, or high heat?
I would still sear the roast in a pan if possible before transferring to a slow cooker. If you have the time, go with low heat for 7-8 hours or until it’s fall apart tender. For high, maybe 2-3 hours or until the roast reaches an internal temperature around 200ºF to 205ºF.
Would top round roast work for this?
Yes, I think that should work fine. Let me know if you give it a go.
10.5 oz is that for the toast only it is that for 1/8 of the roast and veggies ? Does that count the gravy as well. Thanks
It’s for roast and veggies together with broth. If you need 100% accuracy it’s best practice to weigh your finished roast and either broth or gravy to find the weight of your servings. The macros will still be the same for 8 servings, but weight may vary.
Ive seen other recipies use red wine. What liquid would substitute for that in this recipe?
Definitely. That’s a bit more traditional. I would add 1/4 to 1/2 cup of red wine at the same step and just cook it down until very little liquid remains. It may take about 5 minutes longer than just the vinegar.
I made this last night. I didn’t have any red wine vinegar so I used apple cider vinegar. I think it tasted fine. The meat was tender and the vegetables tasted great!
I didn’t have a turnip but used small potatoes and baby carrots un cut.. both maybe cooked a little more than needed.. but the roast was perfect.. fell apart delicious! Thank you so much for this recipe!
Delicious recipe! I tried it last night and it was a hit with the whole family. My only regret was I didn’t have bone broth. I had to use beef broth instead. This was just as tender, if not, more tender than using a slow cooker. Love my Ninja Foodi! Will definitely be making this again.