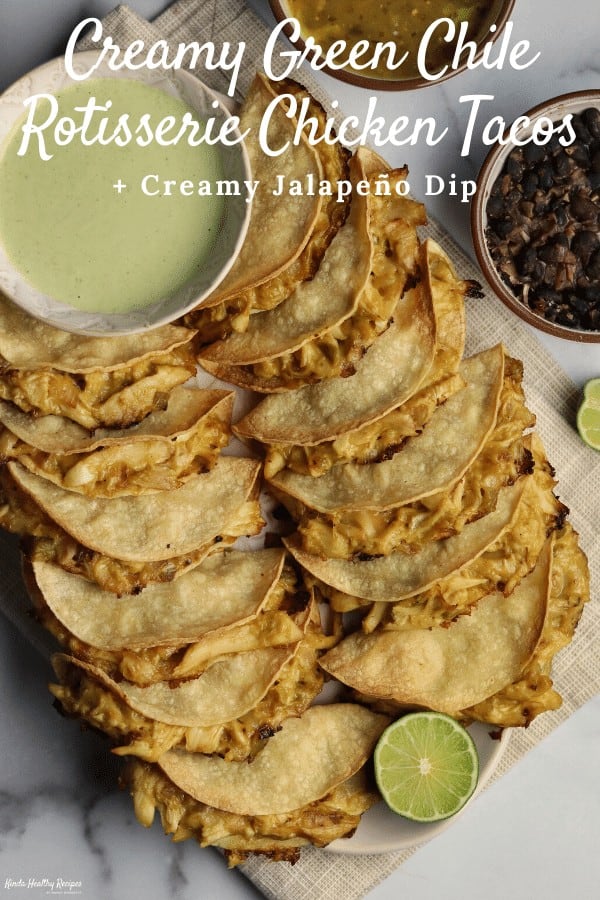
These green chili leftover rotisserie chicken tacos are a love child of two of my most popular recipes—baked chicken tacos and cheesy beef tacos. They pair the onion and garlic base of the beef tacos with the cheesiness of the chicken tacos.
If you’ve made any of my baked tacos, you know this recipe is fairly simple and makes a big ol’ batch of tacos. So whether you’re feeding a crowd or need a quick snack to pop in the air fryer, you’re in the right place.
How to Make Green Chile Leftover Chicken Tacos
Part of the beauty of rotisserie chicken tacos is the fact you won’t need to cook any chicken. Just pick up a rotisserie chicken or if you have a Costco nearby, some of their pre-pulled rotisserie chicken, and you’re good to go.
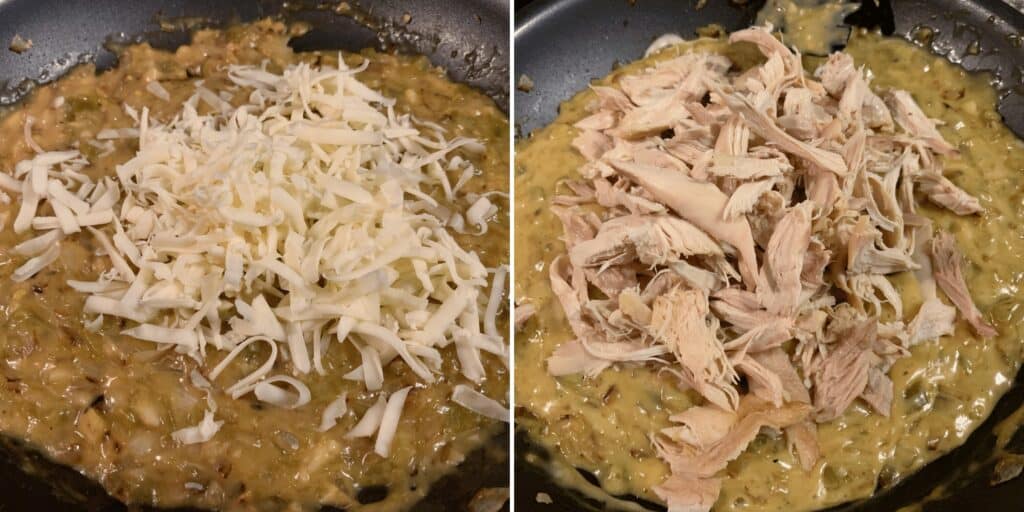
Before we get to the chicken, though, you’ll need to sauté some diced onion in a tiny bit of olive oil before adding minced garlic, diced chiles, cream of chicken soup, and shredded monterey jack cheese. Fair warning: it’s not going to look all that pretty!

Cream of Chicken Soup Alternatives
If you wanted to skip the cream of chicken soup, here’s a few ideas:
- Blended cottage cheese. See my green chile enchiladas for an example.
- Go with a more classic cheese sauce in a separate saucepan. My Cajun mac and cheese is a great example of this.
- Jarred queso like in my chicken fajita pasta bake.
- You can also take the flavor profile in a different direction with the sauce from my chipotle rotisserie chicken tacos recipe.
Rotisserie Chicken Nutrition Info Note
If you’re a macro counter extraordinaire, I used the USDA food database entry for rotisserie chicken breast without skin to calculate the nutrition facts. This is a great resource to use if you’re unsure about nutrition content for certain foods that may not be easy to locate on calorie tracker apps like MyFitnessPal.
In case you wanted to make your own chicken instead of using rotisserie chicken, check out my Mexican shredded chicken recipe or chicken carnitas.
Filling the Tortillas and Baking the Chicken Tacos
Unlike my original chicken, beef, or breakfast tacos, I went with white corn tortillas here instead of the extra thin corn tortillas. I didn’t notice much difference in the way they baked, so I’d venture to say you could use the extra thin tortillas to save a few calories (though the difference is rather small).
No matter which tortillas you use, be sure to wrap them in a damp paper towel and microwave for long enough. They should be warm to the touch and pliable. If they’re cool and keep flopping open when folding, heat them a bit longer.
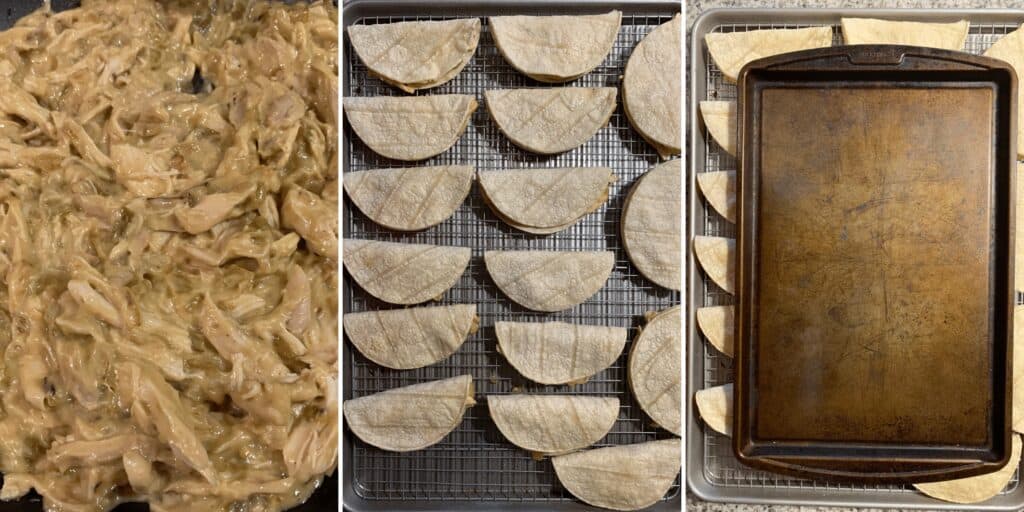
I’ve tested several different methods for baked tacos, and the wire rack over a baking sheet seems to make the crispiest tacos. If you don’t have a wire rack, you can bake them directly on the pan. Flipping 16 tacos halfway through baking is a pain, but it will help them get a bit crispier if you go this route.
The second baking sheet on top is entirely optional. I tested a batch with no sheet on top, and the tacos bake fine with minimal flare ups around the edges.
And that’s it for baking. You’ve got 16 creamy green chile chicken tacos on your hands. Serve with creamy avocado and jalapeño salsa or spicy zucchini salsa.

Now let’s talk about reheating.
How to Reheat the Chicken Tacos
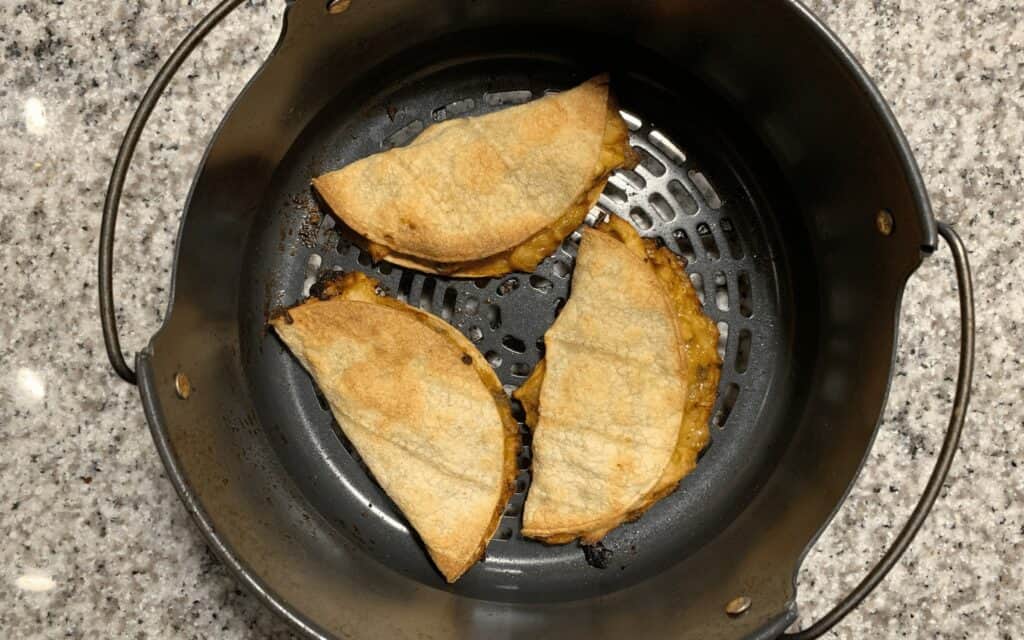
These tacos are best when reheated in an oven or air fryer. The air fryer method is my favorite since you won’t need to preheat anything. My 6.5qt Ninja Foodi at 400F for 8 minutes reheated and crisped 3 refrigerated tacos perfectly!
If you have questions about freezing or other reheat methods, check out my free Facebook group. There are more than 14,000 home cooks there who know way more about making and reheating things than I do!
These would also be great with my air fryer Mexican potatoes!
And if you have any other questions about these rotisserie chicken tacos, ingredient swaps, or cook methods, drop a comment at the bottom of this post. You can find the printable recipe card below along with the creamy jalapeño dip in the notes section.

Creamy Green Chile Leftover Chicken Tacos
Ingredients
- 12 oz Shredded Rotisserie Chicken, meat only no skin
- 1/2 Tbsp 8g Olive Oil
- 1 medium, 200g Yellow Onion, diced
- 4 cloves Garlic, minced
- 10.5 oz can Fat Free Condensed Cream of Chicken Soup
- 4 oz can Diced Green Chiles
- 4 oz Monterey Jack Cheese, shredded
- 16 White Corn Tortillas
Instructions
- Preheat oven to 450F and prepare a baking sheet with a wire rack on top. (You can also bake directly on the baking sheet.)
- Heat a large skillet over medium-high heat with the olive oil. Add the diced onion and cook for 5-6 minutes until they begin to soften and slightly brown. Add the garlic and cook for another 30-60 seconds until fragrant.
- Add the green chiles and soup to the skillet, stirring to fully incorporate. Remove from the heat and add the shredded cheese, stirring until melted and evenly distributed. Add the shredded chicken, stir together, and set aside.
- Wrap the tortillas in a damp paper towel and microwave for 60 seconds. Place 4 tortillas at a time (to keep them warm) on the wire rack. Fill one half of each tortilla with the chicken mixture and fold over to seal. Repeat to fill all the tortillas as evenly as possible.
- Spray the tops of the tacos with a tiny bit of cooking spray and bake for 25-30 minutes until the tacos are as crispy as you’d like. Different sizes of baking sheets will affect bake time so keep an eye on the tacos. Optional: place a second baking sheet on top of the tacos for the first 10 minutes to prevent any tacos from opening during baking.
Notes
For the Creamy Jalapeño Dip
Mix the following together in a food processor.- 1 C (227g) Fat Free Greek Yogurt
- 2 oz Pickled Jalapeño Slices (no juice)
- 1 handful Cilantro
- Juice of 1 Lime (about 15-20g)
- Pinch of Kosher Salt


Loved these tacos for Super Bowl Sunday. They were a hit! Super easy to make and delicious the next day reheated in the toaster oven.
These are nacho average tacos! I can’t eat many carbs due to a gastrointestinal issue, so I make fewer but fuller tacos and can’t get enough! I’m not a fan of cream of chicken, but the suggested replacement is just as quick, easy, and delicious. These tacosa re full of flavor and so quick to make. For extra diggity, pair with a creamy cilantro ranch and you’ll keep coming back for more!
This is my husband and I’s FAVORITE Mason recipe. I typically double the recipe and make two batches at once so we can freeze a good portion. If you have room in your macros, there’s nothing wrong with adding a bit of extra cheese. The trick to keeping the tacos closed is putting a pan on top for the first 10 minutes! We also like ours a little crispier so we add about 5 minutes onto the cooking time. DELISH.
This is such an easy week day taco Tuesday meal. If your carbs are low you can put the chicken mix over cauliflower rice. It’s so good!
Chuy’s aint got nothing on these bad boys. These are Amazing. I have made so many of these and they are perfect meal prep freezer food!